Showing posts with label Artillery. Show all posts

Monday, May 5, 2014

Kingdom of Britannia: Armstrong 12lb Gun

I am finally getting round to posting this. The gun has been completed for months, but I finally got round to putting the finishing touches to the base last night. I've had quite a break from painting Dystopian Legions, but I've been working myself up to getting the army finished. Only a few (well 4.5) units to go, and a couple of vehicles. Maybe the arrival of the Black Wolf Section, being a small but characterful section with a different scheme will get me on the path again.

Anyway, here are the pics your here to see:


Close-ups of the crew here. Full review of the mini here.

Monday, September 9, 2013

Dystopian Legions: Kingdom of Britannia, Armstrong Gun

I fielded the Armstrong 14lb cannon in my Kingdom of Britannia army for the first time this week, and I must say, I was suitably impressed. The rules make it not only good anti armour, but also very good against infantry, especially the multi-wound kind.  It was definitely the Man of the Match as far as I'm concerned, so, I think it's rather safe to say it'll be making a return to the field soon. Which of course means I better finish off the paint job!

The crew have been painted for a while, but the gun was waiting till I had made a nice little scenic base for it till it got a coat of paint, as I do like the nice bases these guns come on. The scenery has been built now, and the gun is ready to be painted. Hopefully in time for my next game.

The crew:
 

The loader has been magnetised so he can be removed from the base for transport. I may have to do the same for the gunner, but so far it seems to be fine as his hat doesn't go much higher than the gun.
I went for a rather traditional British Army Artillery scheme here.

The Cannon:


The barbed wire is from Army Painter, the sandbags and bricks are Secret Weapon. I forgot to place the box of ammunition that comes with the mini on the base. I'll do that before painting.

Tuesday, April 30, 2013

Dystopian Legions: KoB Royal Artillery

For my first HMG, I decided to paint it in the colours of a Line section, so it could be fielded as a support weapon for that selection. However, for my second, since you can only have 1 HMG per line section, I decided to paint this one in the colours of the Royal Artillery. If I want to field a support HMG section, I can always just stick them together anyway. I would photo the two together, however, the other is currently on display at my FLGS (with one of my line sections and Sergeant), where is hopefully working to draw new players to the game.


Thursday, March 28, 2013

Kingdom of Britannia: HMG

Not the cleanest paint jobs, and there will be some touching up to do on the faces in particular, but here are some shots of my Kingdom of Britannia HMG team, as they will be entered for this month's Colore ton Monde (it has wheels, so it fits).
They are painted with yellow/buff facings so that they may be added as a support option for my yet to be bought 3rd Rifle Section, the Prince of Wales' Own Volunteers/South Essex, although, this may require the green-stuffing of three feathers, and or an eagle on the pith helmets, just to really make them stand out. It was a choice between this, or to paint them as actual artillery copsmen in blue. I decided to go with more red-coats for now, as I still want red to be the main colour of the force, at least to begin with.


Wednesday, October 3, 2012

Sekrit Projekt II

Part two of my Sekrit Projekt. Now coming together. Here's a kind of how-to for the guns I have scratch built.
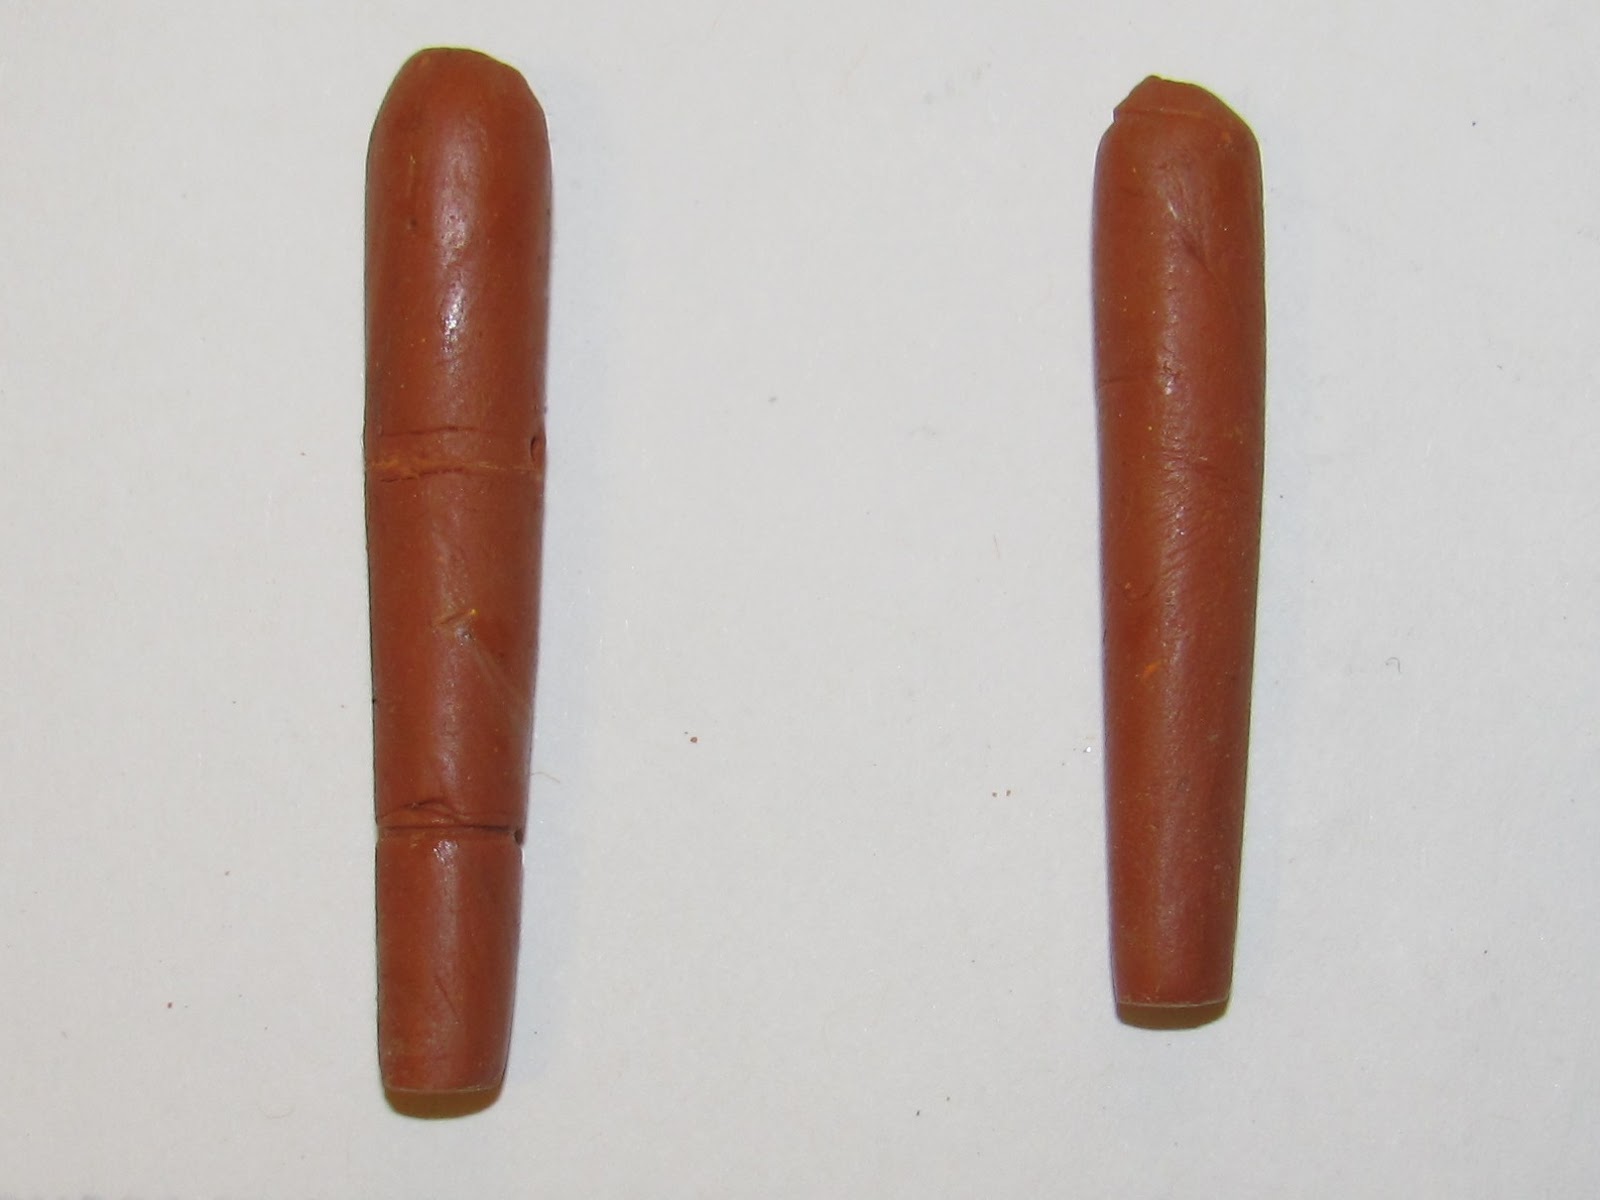
Sausages of milliput. Kindergarten education in effect.
The starting point for each cannon was a sausage of milliput, rolled to the desired thickness, and left overnight to dry. In fact, the thicker of the two required nearer 48hrs to be completely rigid. I tried to make a couple of grooves in the barrels (on the left hand side in the above picture) to add some interest to the otherwise plain surface.
Brass rod through the barrels
and details sculpted
Brass rods were placed through the barrels at the right distance to balance the guns when placed in their carriages. A little more milliput was used to sculpt the mouths of the barrels, and a little more around the brass rods to thicken them up. A little knob of milliput was added to the rear of each barrel, and a touch-hole added to each. I tried to cut a couple of grooves onto the barrels, just to add a little decoration. This turned out to be harder to do when the milliput was dry, as it had a tendency to crumble.

What a mighty pair
The cannons were then mounted on the carriages made from the moulds I had previously made from the Sea Dogs Deck Guns. The pins through the barrels being used to support the guns. The carriages really take a couple of uninspiring guns and make them into believable artillery pieces.

Liquid green stuff to cover some chips and holes
Complete and ready for painting. I had tried to make a mould of the Khadoran anvil from the shield of a M.O.W. Kovnik (to represent a captures Khadoran Gun), but the curvature on the underside was not enough to go round one of the barrels. I can try to sand more of the underside to make it fit, or curve the mould more once I have taken an impression of the symbol, but neither is sure to work.

Otherwise, I have spoken to a friend who has suggested he may be able to find some Fleur-de-lys from the shoulders of some GW battle maidens that I can use to make a mould. That would be ideal.