Showing posts with label Basset Tankette. Show all posts

Saturday, November 9, 2013

Terrier Ironclad WIP

I started painting the Terrier Ironclad the other night. I went with the same blue scheme as I used for the Bassets. I am finding it more of an issue to paint such a large vehicle. I undercoated with gesso, and there was my first issue. In my rush to get the model assembled, I took it right out of the box and put it together, without giving it a wash before hand. As I had previously noted with my Bassets, if you do this to such large pieces of resin, you have an issue with left over release agent. This led to some parts of the model rejecting the undercoat. Worse, once I started with the base coat of a thin wash of blue and black, I noticed some of the undercoat peeling off, and other larger areas hidden between the tracks and the main body of the Ironclad where I had missed completely with the undercoat. My laziness/eagerness at the start of the project is going to cost me time in reparations before I continue, still, at least she won't be plain resin for her first outing on the table next week.

Yesterday evening I filled in some gaps and gave the blue a wash with Nuln Oil, giving her the first of many layers that will be required to get her table ready.


Royal Scots Cap Badge
Going with my current trend of basing my DL sections on real units, I decided my ironclads would be driven by members of the 2nd Dragoons,  Royal Scots Greys Regiment, who were in real life given tanks after their invention. This means I am currently tracking down some flags to stick on this beauty, to make it more of a centrepiece. It also gives me options for various insignia which I can use to liven things up.

Anyone out there who knows where to get good flags, please let me know, as I've never bought any pre-made before

The name of this tank will have to be H.M.I. Ewart. (H.M.I. standing for Her Majesties Ironclad, and Ewart after the famous Royal Scots Grey Ensign, Charles Ewart).

I'm now off on the hunt for flags and cavalry pennants to use for this, and to put on my Bassets too.

Wednesday, February 6, 2013

Kingdom of Britannia: Basset Tankettes III

I think I'm happy with these now, and will get on with making the bases, as there's nothing more to add to the painting of the minis.

Last night I did a last wash of watered down arcane blue (P3) over the brass wheels, followed a  by a mix of terracotta earth and Lahmian medium, then a dab of yellow earth. I have also included a picture of the Tankette beside a Rifleman, to show the Tankette to scale. It may end up a few millimetres higher once the base is complete, but not much more than that.


Tankette to scale
Wash of Arcane Blue (P3)


The second section of Riflemen are well on their way now. Their base coat is all but done, just some inks and highlights to finish them off. There's a drummer boy in the section too, painted in the same scheme and at the same time, but he seems to have fallen off the edge of the pictures. Man, inspiration has truly struck for this army. I think it helsp that the options are so far limited for troop choice. The only think I am not yet in the zone for are the character model from the box set, and the Sky Hussars (I don't know what colour scheme I want for either).


Friday, February 1, 2013

Kingdom of Britannia: Basset Tankettes II

More WIPs of the Basset Tankettes (previous post here). Almost there. Just a bit of detailing and weathering to do. The wheels for the tread need something done to them, they're still far too bright an factory new to look good. There's also some detailing I did one one of the two that needs repeated on the other, now that the original numbering I painted on has been hidden by the tracks.
I was wondering before whether or not I would be using the bases that came with these guys, as they're not all that necessary for the game. However, after I glued the tracks on, it became clear the bases were a must, as the back of the tread rises up from the table, meaning the centre of gravity of these guys is a little too far forward for them not to be based. I don't mind, the larger base size will (hopefully) allow me to go a bit more scenic.


One thing I am rather liking is the way the old Citadel Colour Flesh Wash I have looks great as rust. I have some Secret Weapon weathering powder rust colour to add too, although I will have to use is sparingly, not to over do it on these small minis. I think I'll have to go get some mud coloured powders to go on the tracks.

Once I start on the bases, that will give me a great opportunity to try out the little bricks I bought (also Secret Weapon, these guys are really going for it with their great releases)


In further news, the second section of Riflemen is based and primed. I went with a grey primer, as these guys will be following a different painting scheme from the first unit. I'll be going back to a scheme I wrote out for my 95th Rifles. That post is, coincidentally, the post with the most hits by a long margin for this blog. I guess there's a lot of gamers out there painting the 95th!

Friday, January 25, 2013

Kingdom of Britannia: Basset Tankettes

I have made a start on the Tankettes that I had reviewed here. I decided not to go with a camouflage green/khaki colour, as I feel it doesn't fit with the redcoat image. Let's face it, if the bulk of your army is running around wearing red, you're not going to bother too hard to hide your heavily armoured tanks.

For inspiration on colour schemes, I turned to the nearest real life example of contemporary (to Victorian times) tanks. What I decided to do was use Artillery pieces as a guide for my colour scheme. This meant a washed out blue scheme. I think it works quite well.


They look a little boring from those angles, but with the engines and exhausts, the view from above is a little more exciting. I just didn't take a picture from that angle. That with a little more detailing, and maybe some rust and they'll really pop.

I was really happy with the little freehand numbers I painted on the sides, leaving'1' free for a Sergeant model when it becomes available. However, when I dry-fitted the treads, i noticed the number was half hidden behind them. Oh well, looks like I'll have to do some more freehand on the front, or maybe the big round engine plate at the back, after all, we don't need the enemies to see the numbers.

Monday, January 7, 2013

Dystopian Legions: Basset tankettes

I bought these little monsters a couple of days ago, so I thought it might be an idea to put up a review of them here, as there are a couple of things I would like to say about them.

First off, the resin. I am extremely impressed by the quality of the resin on these sculpts. there are no issues with mold lines, bubbles or excessive flash (which has been somewhat of an issue with Spartan's metal minis so far).

There are a couple of things I did not like so much, mostly with the metal parts.

First off the bat, the kit comes with 4 little metal parts that I was unsure where they went. With a little experimentation, I figured they went one on each side, as a middle support for the treads. I'm unsure as to whether or not they are completely necessary or not, but there you go.

The offending part, in what I assume is the right place.
Secondly, I would have preferred if the part of the gun barrel that goes into the tank was just a touch longer. The hole in the resin is of ample size, but there is only just enough of a nub on the metal side to place in the hole. In fact I may end up having to pin these, the joint is so fragile. An extra millimetre on the metal would have more than fixed this issue.

Another niggle I have with the metal parts is the doors of the hatch. I love that the hatch doors are separate, this allows for addition of what I assume will be a leader figure for the section at a later date. Great idea. However, the to allow for this figure to be placed, the hole in the hatch is deeper than the hatch doors that are supplied. I understand why this is the case, but it did mean I had to find a filler to ensure the hatch doors I glued as closed did not sink into the tankette. This was easily remedied with a chunk of metal flash from the treads. On the plus side, this space leads to easy conversion options, and as I stated further options for Spartan to sell tank commander minis. Also, the doors being metal, even if you glue them closed, they look a little more realistic than moulded parts.


This brings me onto my last point. The treads this to me was the major issue with these models. At the back of the tread, there is a point where each part was attached to it's sprue. The point of contact was rather large, and was snipped at the factory before packaging. What you are left with is a rather unsightly flat part on the back of the tread. This shouldn't really be a problem, as you can file it flat, or try and shape it to look like the rest of the tread. I think the best way to deal with it is to cover it when basing, with either mud or something else, as it's placed on the back of the tread at the bottom. So maybe not a deal breaker, but it was less of a quality finish than I have come to expect from Spartan.


Other things contained in the box include a blank activation card, and two game cards that will work for all Britannian Ironclads. There were also a couple of random cards with pictures of The Prussian character and the Teutonic Knights artwork. These seem to just be adverts for Spartan Games.

In summary. These look good, and although I have stated some niggles with the metal parts, for the most part, these are miniatures do exactly what is says on the tin.

All in all, I give this kit a 7 out of 10. I can't wait to get them put together and painted, and get them on the table.

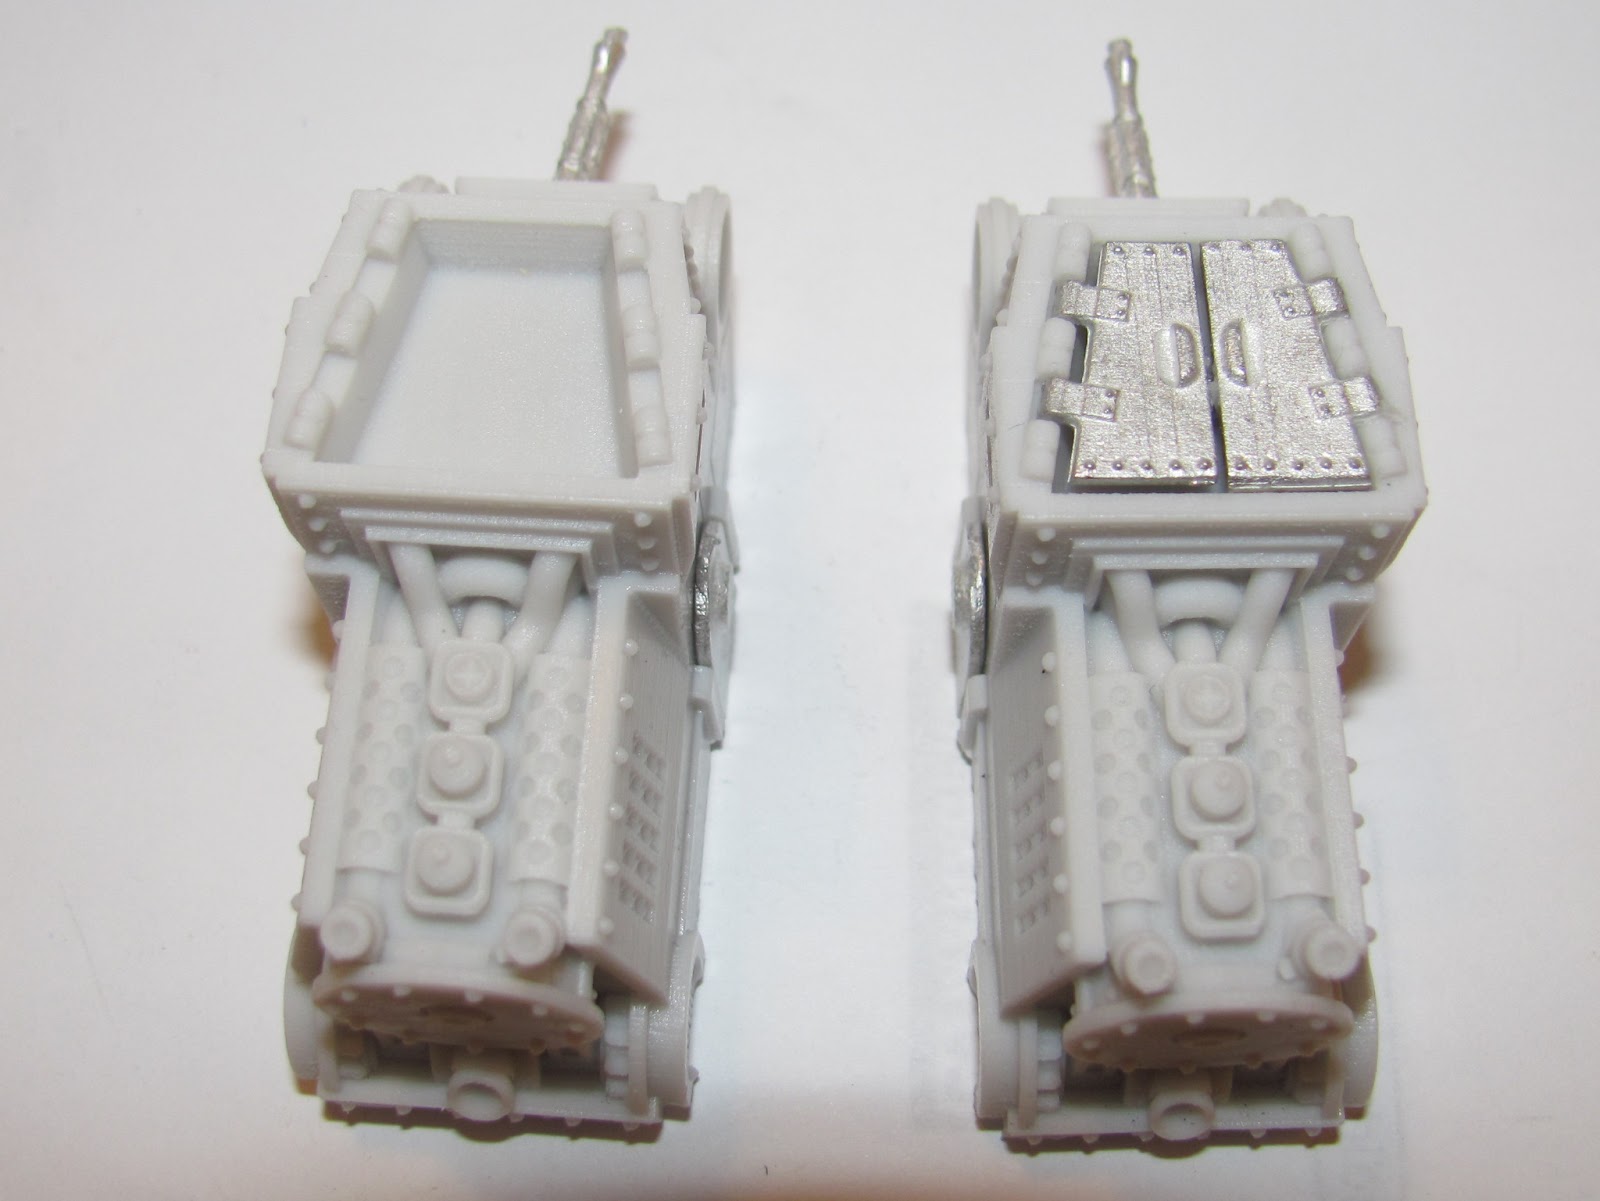
Wonky gun on the LHS and if you zoom on the RHS you can just about see the metal holding the doors in place.